创建一个钱包
在阅读本教程前,假设您已经拥有了一个具有管理钱包账户权限的 API Key 。如果您还没有创建 API Key,可以查看创建 API Key 教程进行创建。
Safeheron 团队下包含资产钱包和 Web3 钱包两种类型,点击这里了解详情。
通过此教程,您将使用 API:
- 创建一个资产钱包。
- 向资产钱包中添加一个 Token。
最后,通过水龙头向钱包转入一些 Token。
创建资产钱包
请求参数
- TypeScript
- Golang
- Java
interface CreateAccountRequest {
  accountName?: string;
}

const request: CreateAccountRequest = {
  accountName: 'first-wallet-account',
};
type CreateAccountRequest struct {
  AccountName string `json:"accountName,omitempty"`
}

createAccountRequest := CreateAccountRequest{
  AccountName: "first-wallet-account",
}
public class CreateAccountRequest {
  private String accountName;
}
CreateAccountRequest createAccountRequest = new CreateAccountRequest();
createAccountRequest.setAccountName("first-wallet-account");
请求接口
- TypeScript
- Golang
- Java
interface CreateAccountResponse {
  accountKey: string;
  pubKeys: Array<{
    signAlg: string;
    pubKey: string;
  }>;
}

const response = await client.doRequest<CreateAccountRequest, CreateAccountResponse>('/v1/account/create', request);
type CreateAccountResponse struct {
  AccountKey string `json:"accountKey"`
  PubKeys    []struct {
    SignAlg string `json:"signAlg"`
    PubKey  string `json:"pubKey"`
  } `json:"pubKeys"`
}
var createAccountResponse CreateAccountResponse
accountApi.CreateAccount(createAccountRequest, &createAccountResponse)
public class CreateAccountResponse {

  private String accountKey;
  private List<PubKey> pubKeys;
  static class PubKey{
      private String signAlg;
      private String pubKey;
  }

}
CreateAccountResponse createAccountResponse = ServiceExecutor.execute(accountApi.createAccount(createAccountRequest));
响应数据示例
响应数据中的 accountKey ,唯一代表一个钱包,保存为后续使用。
{
  "accountKey": "account4b8d2c00520646c8862b68420aa1bc55",
  "pubKeys": [
      {
          "signAlg": "secp256k1",
          "pubKey": "03ba5cef******490469dadd2a"
      }
  ]
}
向资产钱包中添加 Token
SepoliaETH 是 Sepolia 测试网的原生 Token,在 Safeheron 平台与此 Token 对应的 coinKey 是 ETH(SEPOLIA)_ETHEREUM_SEPOLIA ,我们以添加 ETH(SEPOLIA)_ETHEREUM_SEPOLIA Token 为例,说明如何向资产钱包中添加 Token。点此可以查看 Safeheron 支持的所有 Token。
请求参数
- TypeScript
- Golang
- Java
interface AddCoinRequest {
  coinKey: string;
  accountKey: string;
}

const request: AddCoinRequest = {
  coinKey: 'ETH(SEPOLIA)_ETHEREUM_SEPOLIA',
  accountKey: 'account4b8d2c00520646c8862b68420aa1bc55',
};
type AddCoinRequest struct {
  CoinKey    string `json:"coinKey,omitempty"`
  AccountKey string `json:"accountKey,omitempty"`
}

addCoinRequest := AddCoinRequest{
  AccountKey: "account4b8d2c00520646c8862b68420aa1bc55",
  CoinKey:    "ETH(SEPOLIA)_ETHEREUM_SEPOLIA",
}
public class AddCoinRequest {
    private String coinKey;
    private String accountKey;
}
AddCoinRequest addCoinRequest = new AddCoinRequest();
addCoinRequest.setAccountKey("account4b8d2c00520646c8862b68420aa1bc55");
addCoinRequest.setCoinKey("ETH(SEPOLIA)_ETHEREUM_SEPOLIA");
请求接口
- TypeScript
- Golang
- Java
interface AddCoinResponse {
  [index: number]: {
    address: string;
    addressType: string;
    amlLock: string;
  }
}

const response = await client.doRequest<AddCoinRequest, AddCoinResponse>('/v1/account/coin/create', request);
type AddCoinResponse []struct {
  Address     string `json:"address,omitempty"`
  AddressType string `json:"addressType,omitempty"`
  AmlLock     string `json:"amlLock,omitempty"`
}

var addCoinResponse AddCoinResponse
accountApi.AddCoin(addCoinRequest, &addCoinResponse)
public class AddCoinResponse {
    private String address;
    private String addressType;
    private String amlLock;
}
List<AddCoinResponse> addCoinResponseList = ServiceExecutor.execute(accountApi.addCoin(addCoinRequest));
响应数据示例
响应数据中的 address 即为 ETH(SEPOLIA)_ETHEREUM_SEPOLIA Token 的地址。
[
  {
    "address": "0x1ec4fb20d8955d9d6a4ae45f01af04e170c0c022",
    "addressType": "DEFAULT",
    "amlLock": "NO"
  }
]
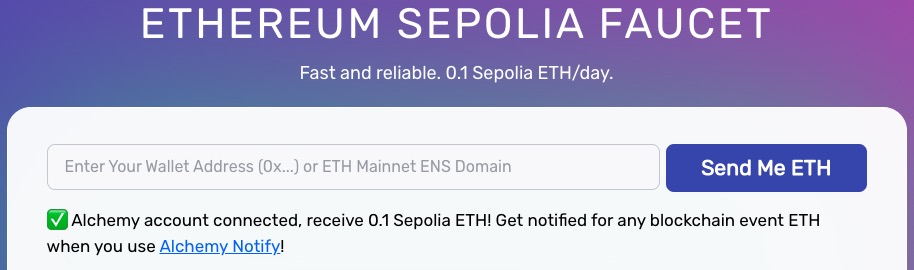
从水龙头转入 Token
您已经获取到 coinKey 为 ETH(SEPOLIA)_ETHEREUM_SEPOLIA 的 Token 地址,接下来,可以通过水龙头向资产钱包中转入 ETH 。如下图,我们在文本框中输入 ETH(SEPOLIA)_ETHEREUM_SEPOLIA Token 对应的钱包地址,点击 Send Me ETH 按钮,水龙头就会向我们提供的钱包地址上转入一笔 Token。
Webhook
从资产转入时刻开始,到最终被链上确认,需要经历一个过程,我们推荐您使用 Webhook 来感知这一过程。
通过 Webhook 来感知交易的进度,需要在 Safeheron Web 控制台 API 管理页面中配置 Webhook URL。
下一步
本教程涉及到的代码,已经在 Github 开源,获取完整源代码:
至此,您已经创建并拥有了一个钱包,并且向钱包中转入了资产,接下来,您可以: